


DIY Instagram Photo Frames
- Maddie Browne
- Jun 18, 2018
- 2 min read
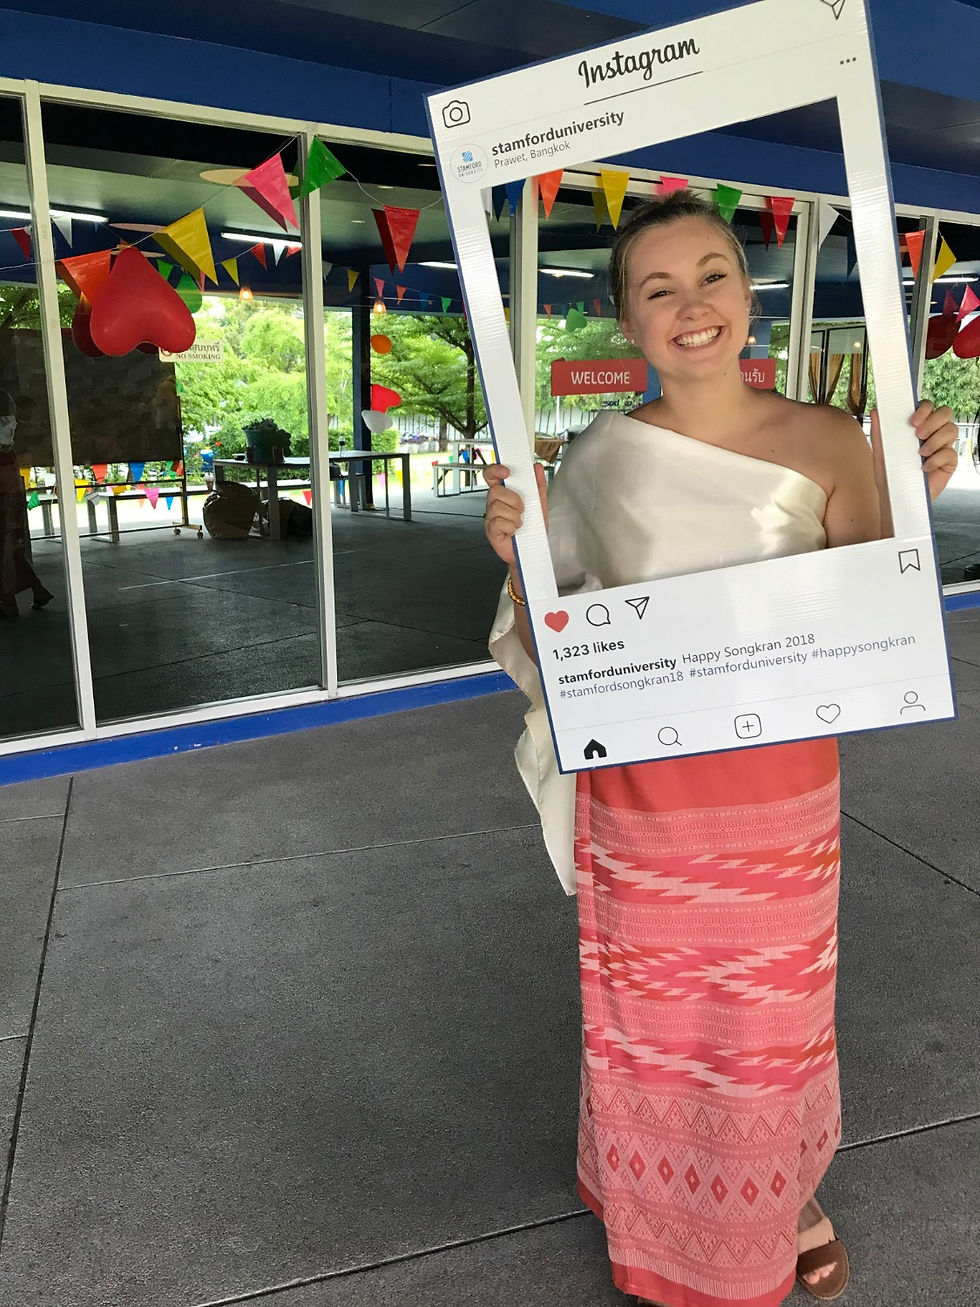
Recently I have noticed that a lot of people are using Instagram frames at parties, social events and as a marketing tool. I loved the idea of these and thought they looked amazing. However when I looked into getting one professionally made it was crazy how much some people were charging for them. So I decided to put my design skills to the test and made one myself.
It was relatively easy to do and if you have any experience with any of the Adobe programs you will also be able to pretty easily make a replica.
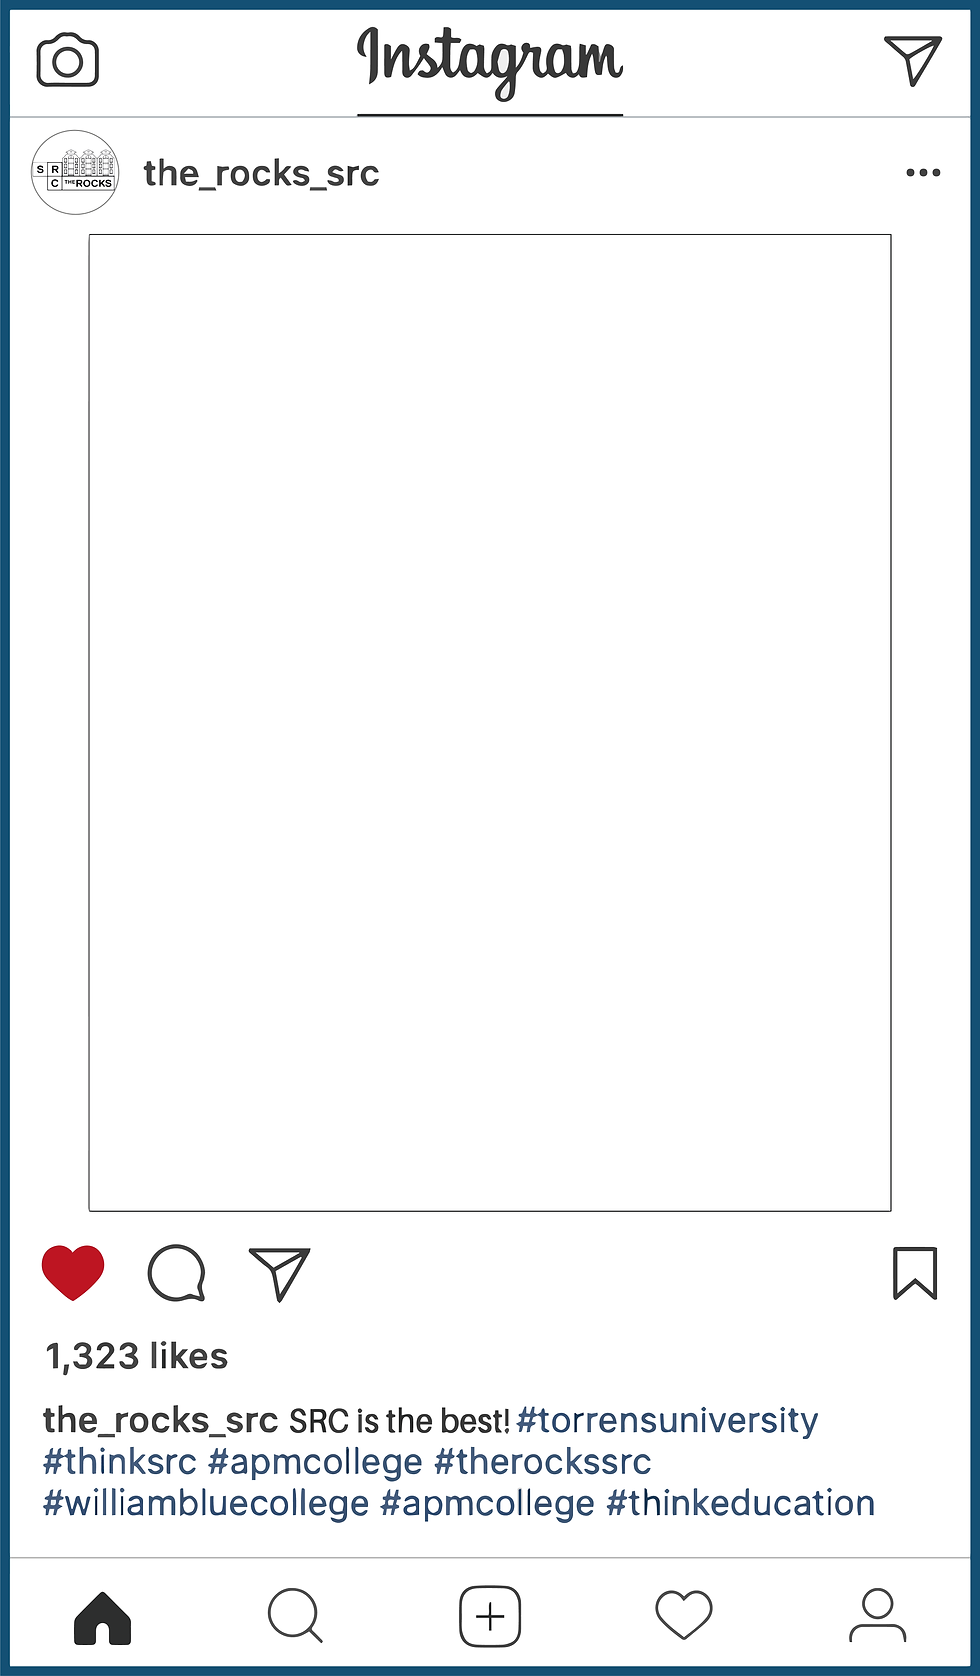
So the simplest way I felt like it was to tackle this Instagram frame was to first take a screen shot of a normal Instagram feed on my phone. I then transferred this file to my laptop and opened it in Adobe Illustrator. From here I 'traced' the image using the Image Trace tool. This pretty easily picked up the general pieces of the image that I wanted. It also changed all the elements in the photo to objects, which made it so much easier to play around with.
I then went on to change the details like the name, caption, location, profile picture and remove the middle photo, as this will be used for the frame.
If you are planning on re-creating this frame, I recommend using the font Microsoft New Tai Lue in bold for the Instagram name at the top and bottom of the image and using Microsoft New Tai Lue in regular for the caption, location and hashtags.
The CMYK for the blue colour I used for the hashtags is C=79 M=58 Y=29 K=16.
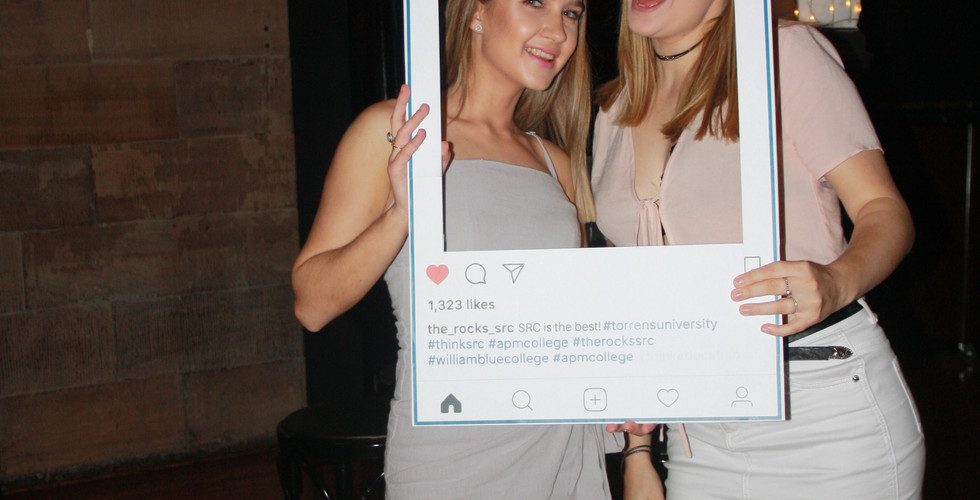
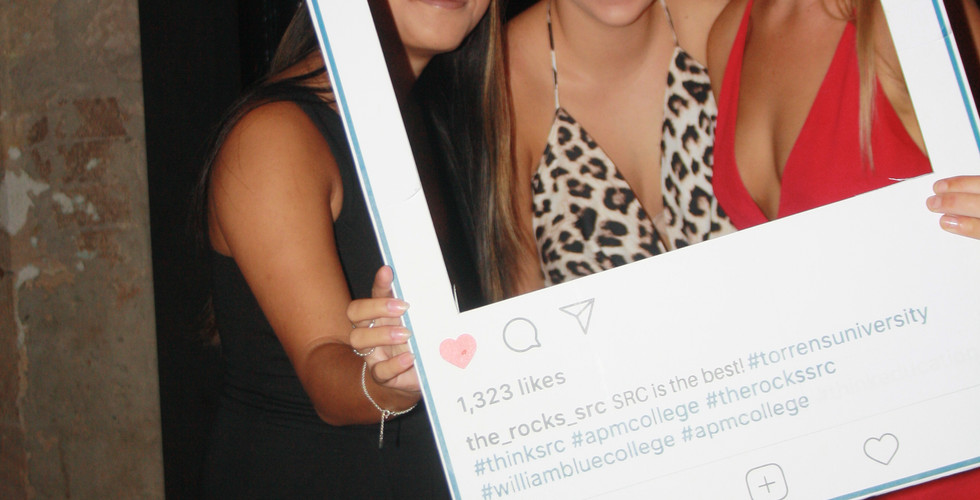
I then went on to print out the frame and tile the image so I could glue it all together on a scrap piece of cardboard.
However, if you are not very competent in adobe programs or have never used them before, you can always save the image below, paste it into Microsoft Word and place large white text boxes over the text on my frame and then use the fonts I have mentioned previously to fill in your own details.
If you would like me to personalize my frame for you or your event please shoot me an email and I am happy to do so.


Comments